Are you facing the challenge of a dripping faucet or a mysterious water leak that's driving up your utility bills? This guide will arm you with the knowledge to identify the root causes of leaks, from mineral buildup to a subtle roof leak, and provide practical steps for water leak repair.
You'll learn how to use basic tools like pliers to fix a leaky faucet and when it's time to seek professional help. By following our advice, you'll not only prevent damage from mildew and water waste but also enjoy the peace of mind that comes with a well-maintained plumbing
system. Let's tackle those leaks and ensure your plumbing is in top condition.
Understanding the Common Causes of Faucet and Plumbing Leaks
When you encounter a leaky faucet or plumbing issue, understanding the root cause is key to a swift resolution. This section will guide you through identifying worn-out washers and O-rings, recognizing corrosion in valve seats, and detecting loose or damaged parts that may require tightening or replacement. You'll also learn how to assess water pressure issues that could lead to leaks, and spot cracks in pipes and fixtures. Whether it's a set screw that needs adjusting, a flapper to be replaced, or water heater maintenance to prevent wear, these insights will prepare you for basement waterproofing and other essential plumbing repairs.
Identifying Worn Out Washers and O-Rings
When you're faced with a dripping faucet, the culprit is often a worn-out washer or O-ring.
These small components form a seal to prevent water from leaking through your faucet joints.
To check for wear, you'll need a screwdriver to carefully disassemble the faucet handle. Once inside, examine the washer, typically made of rubber or polyvinyl chloride, and the O-ring, which might be composed of rubber or durable synthetic materials. If they appear cracked or misshapen, it's time for a replacement.
Over time, the constant friction between the washer and the valve seat can cause these parts to wear down, especially in fixtures made of iron or ceramic. If you find water leaks around the handle or spout, it's a telltale sign that these components need attention. Remember, when replacing a washer or O-ring, it's crucial to select the correct size and material to ensure a
proper fit and prevent future leaks.
Regular maintenance, including checking and replacing washers and O-rings, can save you
from the inconvenience of unexpected plumbing issues. If you're unsure about tackling this task, don't hesitate to seek professional help. A skilled plumber can swiftly identify and resolve such issues, ensuring your plumbing system remains in top condition.
Recognizing Corrosion in Valve Seats
Corrosion in valve seats is a common issue that can lead to your faucet dripping after the water is turned off. This deterioration occurs when water minerals accumulate, causing the metal to corrode and the seal between the valve seat and the washer to weaken. During your inspection, look for any greenish or whitish buildup, which indicates corrosion, and consider replacing the affected plumbing fixture to prevent further water leaks.
If you notice persistent dripping from your faucet, it's likely the valve seat that sits within the faucet housing has been compromised. To confirm this, you'll need to disassemble the faucet and inspect the valve seat for signs of damage. Should you find pitting or grooves, it's essential to address these promptly, as they can cause the washer to wear out more quickly, leading to continuous leaks.
Dealing with corroded valve seats requires precision and the right tools. You might need to reface the seat with a special tool or replace it entirely. If you're not confident in performing this repair, it's wise to contact a professional plumber. They have the expertise to ensure that the new valve seat is installed correctly, restoring the integrity of your plumbing fixture and putting an end to those troublesome water leaks.
Detecting Loose or Damaged Parts
Loose components in your plumbing can often lead to moisture seeping through and causing leaks. If you're noticing water pooling around your fixtures, it's time to inspect for any loose parts. Tightening a gasket or securing a relief valve might be all that's needed to stop a leaking tap, but it's essential to address these issues promptly to prevent further damage.
During your routine check, if you find a gasket that's lost its elasticity or a relief valve that's not functioning correctly, these are clear indicators that repair is necessary. For a leaking tap, replacing the gasket or adjusting the relief valve can often resolve the issue. It's a straightforward fix that can save you from the hassle and expense of more significant repairs
down the line.
Remember, appliances like your dishwasher also rely on tight seals to operate efficiently. A
leak in these areas can lead to water damage and affect the performance of your appliance. If you're not confident in your ability to repair these parts, reaching out to a professional for leaking tap repair or appliance maintenance is a wise decision. They'll ensure everything is properly tightened and functioning as it should, giving you peace of mind.
Assessing Water Pressure Issues
Excessive water pressure in your plumbing system can be a silent adversary, often leading to leaks that compromise your foundation. If you notice an outdoor faucet leaks when turned off, this could be a sign that the pressure is too high, causing stress on your pipes and fixtures.
It's essential to monitor and regulate water pressure with a pressure gauge, and if necessary, install a pressure-reducing valve to protect your home's plumbing integrity.
When your pump cycles on and off more frequently than usual, it's a clear indication that you might be facing water pressure issues. This irregularity can lead to wear and tear on your plumbing system, resulting in leaks that may not be immediately visible but can cause significant damage to concrete and other materials over time. You should consider consulting with a plumbing expert who can assess your pump's performance and suggest appropriate repairs or adjustments.
Managing the water flow in your yard is crucial, especially if you're dealing with persistent leaks. An outdoor faucet that drips when not in use could be a symptom of underlying pressure problems that extend to your main water line. By addressing these issues promptly, you can prevent water from pooling and seeping into your home's foundation, ensuring the longevity of your plumbing system and the safety of your property.
Spotting Cracks in Pipes and Fixtures
Discovering cracks in your pipes and fixtures can be a daunting revelation, but it's a critical step in preventing extensive plumbing leaks. If you notice an outdoor faucet leaks when turned on, it could signal a crack in the flange or pipe that requires immediate attention. Inspect visible pipes for any signs of damage, especially after a freeze, as water expands when it turns to ice, often leading to cracks. Addressing these issues early can save you from costly repairs and water damage.
When tackling plumbing leaks, the integrity of the connection points is paramount. A loose nut or a compromised seal can lead to persistent dripping, which over time, can cause significant water loss and damage. If you're inclined to do it yourself, ensure you have the right tools to tighten any loose nuts and replace damaged seals. However, if the crack is substantial or located in a hard-to-reach area, it's wise to seek professional assistance.
Regular maintenance is your best defense against unexpected plumbing leaks. Keep an eye on areas prone to stress, such as where pipes connect to fixtures or bends in the plumbing.
Small hairline fractures can be difficult to spot but can lead to a steady loss of water. If you're unsure about identifying such issues, consider scheduling routine inspections with a plumbing expert who can help you maintain the health of your plumbing system and prevent leaks before
they escalate.
How to Detect Leaks in Your Plumbing System
Uncovering leaks in your plumbing system is a critical step in maintaining your property's integrity. You'll learn to monitor your water meter for irregularities, a sign that hidden leaks may be present. Inspecting walls, ceilings, and floors for moisture can reveal issues behind the scenes, while listening for dripping or running water often pinpoints the leak's location. You'll also discover how performing dye tests on toilets and faucets, using materials like epoxy putty and plastic, can help identify silent leaks. Additionally, checking outdoor areas for wet spots is essential, especially near brass valve stems and drainage systems. These practical strategies will guide you through the detection process, ensuring your plumbing remains leak-free.
Monitoring Your Water Meter for Irregularities
If you suspect a leak in your home, your water meter can be an invaluable tool for confirmation.
Begin by ensuring all water use is ceased; this includes turning off all taps and not using
appliances like your washing machine or dishwasher. With everything off, observe the meter for any movement that could indicate a leak, such as the dial spinning or the numbers increasing. This method can help you detect even small leaks that might not be immediately obvious, like a slow-dripping faucet or a valve seat that's not sealing properly.
After a period of monitoring, if you notice unexpected changes in your water meter readings, it could be a sign of a hidden leak. This could range from a silent toilet tank issue to a more elusive home water leak. To pinpoint the problem, you might need to perform a more detailed inspection or consider dripping faucet repair if that's where the issue lies. Remember, early
detection can save you from more extensive damage and higher water bills.
Should your initial check reveal no immediate changes, don't assume all is well just yet. It's wise
to take a second reading after a few hours, especially if you're away from home during this time.
Any discrepancies between the two readings could indicate water loss from an undetected leak,
prompting further investigation. This proactive approach ensures you stay ahead of potential plumbing problems, maintaining the integrity of your home's water system.
Inspecting Walls, Ceilings, and Floors for Moisture
When you notice unexplained moisture on walls, ceilings, or floors, it's crucial to consider the possibility of a hidden water leak. Discoloration, peeling paint, or a musty odor can all be signs that water is escaping from a pipe or fixture, potentially within a concrete slab or behind metal valves. It's essential to investigate these signs promptly to prevent structural damage and mold growth.
As you inspect your home, pay close attention to areas beneath sinks and around the handles of faucets, as these are common sites for leaks to manifest. If the wall feels damp or you spot a bulge in the ceiling, water may be accumulating due to a compromised valve or pipe.
Identifying these issues early can save you from extensive repairs and the inconvenience of a major water leak.
Should you encounter persistent dampness in a particular area, it might indicate a more serious issue, such as a leak under a concrete slab. This type of leak requires immediate attention, as it can undermine the structural integrity of your home. Engage a professional plumber who can utilize specialized equipment to locate and repair the leak, ensuring your home remains safe
and dry.
Listening for Signs of Dripping or Running Water
Attuning your ears to the sound of dripping or running water can be a telltale sign of a leak in your plumbing system. Even when your irrigation sprinkler is off, if you hear the faint sound of water, it could indicate a breach in your water supply line. Promptly identifying and addressing these sounds can lead to early faucet repair, averting more severe water damage and potential sewage issues.
If you're routinely hearing the drip-drop of water in the silence of the night, it's likely time to fix a dripping faucet. This common household sound often goes unnoticed during the day but can signify a leak that, over time, can lead to significant water waste and increased utility bills. By addressing these auditory clues, you can prevent minor issues from escalating into costly repairs.
When investigating the source of a water sound, consider areas where leaks are less obvious, such as under sinks or behind appliances. A continuous water flow sound could point to a hidden leak that's not just wasting water but also threatening the structural integrity of your home. Engaging a professional for a thorough inspection can ensure that all leaks, apparent or concealed, are promptly and effectively repaired.
Performing Dye Tests on Toilets and Faucets
To uncover silent leaks in your toilet, a dye test is a straightforward and effective method.
Simply add a few drops of food coloring to the tank and wait without flushing. If you see the
color seeping into the bowl, you have a leak that's likely wasting water and increasing your bills.
This simple test can be a first step in your basement waterproofing efforts, helping to prevent
moisture issues before they escalate.
For faucets, a clear sign of a problem is when you notice the faucet dripping even when it's
turned off. To diagnose a leak, you can use epoxy to seal around the base and check if the dripping stops. This temporary fix can help you determine if the issue is with the faucet itself or a deeper plumbing concern, guiding you towards the appropriate repair solution for your lawn's outdoor fixtures or indoor taps.
When conducting these tests, it's crucial to consider the impact of undetected leaks on your home's foundation and lawn. A persistent faucet drip can lead to excess moisture, undermining the structural integrity of your basement and creating ideal conditions for mold growth. By identifying and addressing these leaks promptly, you're taking an essential step in
maintaining a dry and healthy living environment.
Checking Outdoor Areas for Wet Spots
When surveying your outdoor space, keep an eye out for unexpected wet spots on the ground, which can be a clear indicator of a leak in an underground pipe. These areas may be more than just a nuisance; they could signal a need for home improvement to address the underlying plumbing issues. If you spot such signs, it's advisable to use a wrench to check the tightness of visible pipe connections or consider seeking professional assistance to investigate further.
Unexplained moisture on your patio or driveway, especially when it hasn't rained, should prompt a closer examination. This could be due to a leak that's not immediately visible, potentially affecting the foundation of your home. Addressing these leaks early can prevent more extensive damage, saving you time and money on future repairs.
Should you encounter soggy patches in your lawn or near your home's exterior, it's essential to act swiftly. These wet areas can compromise the structural integrity of your floor and walls over time. By identifying and rectifying these leaks promptly, you'll maintain the health of your home's infrastructure and avoid the pitfalls of unchecked water damage.
Step-by-Step Guide to Fixing a Leaky Faucet
Embarking on faucet repair begins with gathering the necessary tools and materials, ensuring you're prepared to tackle any plumbing challenge. Before you dive in, it's crucial to turn off the water supply to prevent any unexpected pressure build-up or water damage to your ceiling.
With the area secure, you'll carefully disassemble the faucet components, identifying any that may need replacing due to wear or damage. Employing putty and new parts as needed, you'll then reassemble the faucet, mindful of any nuances related to water softening systems or
septic tank considerations. Finally, testing for leaks ensures your repair is watertight, safeguarding your home against future plumbing issues.
Assembling the Necessary Tools and Materials
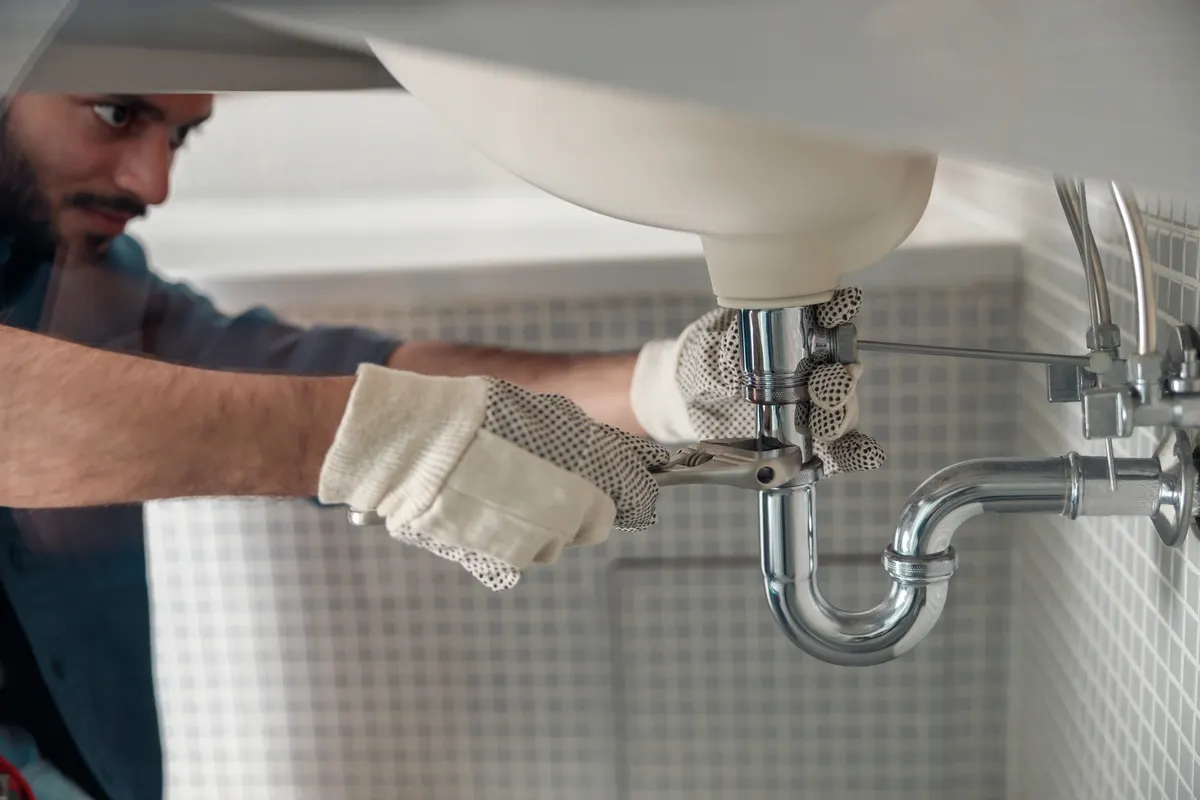
Before you begin addressing faucet leaks, it's essential to gather the right tools and materials to prevent water damage and ensure a successful repair. You'll need a set of wrenches to loosen tight nuts, a screwdriver for disassembling faucet parts, and replacement washers or O-rings that match the size and shape of the old ones. Having Teflon tape on hand can also help seal threaded joints, reducing the risk of future leaks.
When tackling toilet leaks, you'll want to have a new flapper or valve assembly ready, as these are often the source of the problem. Ensure you have a good quality plunger and a drain snake to clear any blockages that might be contributing to the leak. Protective gloves and a bucket can also be useful to keep your hands clean and catch any water that may escape during the repair process.
For more extensive plumbing work, such as fixing leaks in the soil pipe or main drain, you might require a pipe cutter, a hacksaw, and pipe fittings. It's crucial to choose materials compatible with your existing plumbing to maintain the integrity of the system. If you're unsure about the right materials or how to use them, consider consulting a professional to guide you through the process and avoid potential missteps that could lead to further damage.
Turning Off the Water Supply
Before you tackle the leaking sink, it's imperative to turn off the water supply to prevent any further spillage and potential water damage. Locate the valves under the sink and twist them clockwise until they're firmly closed. This precautionary step will ensure a dry work area, allowing you to apply caulk or replace parts without the interference of water flow.
Once the valves are shut off, open the faucet to release any remaining water and pressure in the pipes. This will minimize the risk of an unexpected spray of water when you start your repairs, and it will also help to dissipate any residual odor from stagnant water in the copper pipes. Clearing the lines ensures a safer and cleaner repair environment.
If your sink doesn't have individual shut-off valves, you'll need to locate the main water supply valve for your home. Often found in the basement or on an exterior wall, this master valve will halt water flow to all your plumbing fixtures. Remember, while this is a more drastic measure, it's a necessary step to address the leak effectively and safeguard your home from water damage.
Disassembling the Faucet Components Carefully
Embarking on the task of disassembling a leaky faucet, you'll want to proceed with caution to avoid exacerbating any existing issues. Begin by locating the set screw—often requiring a hex key for removal—and gently disassemble the handle from the stem. This careful approach is crucial for maintaining the integrity of your faucet's components and ensuring successful leak detection and repair.
As you delve into the heart of your faucet, keep an eye out for signs of wear or damage that could be contributing to water heater leaks or dampness under the sink, which, if left unchecked, can lead to mold. Removing each part methodically allows you to inspect the condition of the internal mechanisms, a vital step in pinpointing the source of the leak and planning your repair strategy.
During disassembly, it's essential to organize the parts in the order they were removed; this will simplify reassembly after you've addressed the leak. Whether it's replacing a worn washer or a corroded valve seat, handling each component with care ensures you can restore your faucet to its optimal condition, free from the annoyance of persistent dripping.
Replacing Worn or Damaged Parts
Upon disassembling your faucet, if you discover worn or damaged parts, it's imperative to replace them to fix leaky faucets effectively. For instance, a deteriorated washer made of rubber or steel can be the source of a persistent drip, undermining water conservation efforts.
Replacing these components not only halts the leak but also contributes to the longevity of your plumbing fixtures.
While addressing faucet repairs, it's crucial to be vigilant for signs of a gas leak, particularly if you smell sewer gas or notice a hissing sound near gas lines. This situation demands immediate attention; shut off the gas valve and contact a professional. Ensuring all gas connections are secure and intact during plumbing repairs protects your home from potential hazards.
After identifying the faulty parts, whether it's a cracked O-ring or a corroded valve seat, sourcing the correct replacements is your next step. Opt for quality materials that match the specifications of your plumbing system to ensure a seamless repair. By taking the time to fix leaky faucets properly, you're not only conserving water but also preventing future issues that could lead to costly water damage.
Reassembling the Faucet and Testing for Leaks
After replacing any worn components, you'll begin the careful process of reassembling your faucet. Align each part correctly, ensuring that the compression fitting is snug to prevent future leaks. As you reattach the handle and secure the set screw, be mindful of potential corrosion that could compromise the repair. A meticulous reassembly is crucial for a successful leaky faucet repair, safeguarding your drywall and cabinetry from water damage.
Once the faucet is reassembled, it's time to cautiously restore the water supply and observe the faucet for any signs of leakage. Turn the water on slowly and inspect each connection point, particularly around the compression fitting, for any water escape. This step is vital in confirming that your leaky pipe or faucet issue has been resolved, ensuring the integrity of your plumbing system and the comfort of your home.
Your final task is to test the faucet's functionality, ensuring a steady flow without any drips or leaks. Operate the faucet through its full range of motion, checking for smooth operation and a secure seal. A successful leaky faucet repair not only conserves water but also protects your home from the long-term effects of water damage, offering you peace of mind and a sense of accomplishment in your DIY plumbing skills.
DIY Solutions for Common Plumbing Leaks
Embarking on DIY plumbing repairs can be a rewarding way to maintain your home's integrity.
This section delves into practical solutions for common issues, such as applying sealant to
leaky pipe joints, fixing dripping shower heads, and addressing toilet tank leaks. You'll also learn how to seal cracks in pipes with epoxy putty and when to consider pipe replacement for severe damage. Each topic offers valuable insights into safeguarding your home from water damage, whether it's coming from the wall, roof, or beneath the sump pump. With these leak repair strategies, you'll gain the confidence to tackle plumbing challenges head-on.
Fixing Leaky Pipe Joints With Sealant
If you're dealing with a leaky pipe joint, applying a silicone-based sealant can be an effective solution. Silicone sealants are ideal for creating waterproof seals, particularly in areas exposed to moisture like under your shower or sink. Ensure the surface is clean and dry before application; you might use vinegar as a natural cleaner to prepare the area, which will help the silicone adhere better and cure to form a durable seal.
When working with stainless steel pipes, it's crucial to select a sealant that's compatible with the material to prevent any adverse reactions. A silicone sealant is typically safe for use on stainless steel and can be applied with precision using a caulking gun. After application, smooth the sealant with a wet finger or tool to ensure a tight seal, and allow it ample time to dry before running water through the pipes again.
For those of you with lever-operated faucets that have begun to leak at the joints, a silicone sealant can also be a quick fix. After turning off the water supply, disassemble the lever to access the joint. Clean any debris or old sealant from the area, apply the silicone carefully, and reassemble the lever. This not only stops the leak but also extends the life of your faucet, ensuring smooth operation and preventing future leaks.
Repairing Dripping Shower Heads
If you're troubled by a dripping shower head, it's often a straightforward fix that doesn't require a call to the plumber. Begin by shutting off the water supply to your shower to prevent any mishaps during the repair process. A common cause of a dripping faucet is a faulty washer or O-ring, which can be replaced with basic tools and a trip to your local hardware store.
When dealing with a fix for a leaking tap in your shower, it's essential to inspect the hose and connections for wear or damage. Over time, the hose can degrade or become loose, leading to leaks that not only waste water but also compromise your water heating system's efficiency.
Tightening the connections or replacing the hose can often resolve the issue, restoring proper function to your shower.
For those of you with an interest in gardening, a dripping faucet can have implications beyond the bathroom, affecting your home's irrigation system. Ensuring that all indoor taps, including your shower head, are leak-free helps maintain consistent water pressure and prevents
unnecessary strain on your water heating and irrigation systems. By addressing these leaks promptly, you're not only conserving water but also ensuring your garden receives the right amount of moisture without any waste.
Addressing Toilet Tank Leaks
If you're noticing water around the base of your toilet or hearing a constant running sound, it's likely you have a leak in the toilet tank. To address this, first shut off the water supply using the valve typically located behind the toilet, near the floor. This will prevent further leakage as you inspect the internal components, such as the flapper, which may have deteriorated and could be the source of your leaking faucet.
Once the water is off, remove the tank lid and inspect the flush valve and flapper. A worn-out flapper is often the culprit behind toilet tank leaks and can be easily replaced with a few simple steps. Detach the old flapper from the flush valve, unhooking it from the chain connected to the flush lever, and attach a new one in its place, ensuring it's properly seated to prevent future leaks.
For leaks originating from the tank's connections to the bowl, you may need to tighten the screws securing the tank. Be cautious not to overtighten, as this could crack the porcelain. If the leak persists, the issue might be with the tank-to-bowl gasket or the bolts, which could require replacement. In such cases, it's advisable to turn off the garden hose and other water sources, drain the tank, and replace the faulty parts to ensure a watertight seal and eliminate the pest of a leaking faucet.
Sealing Cracks in Pipes With Epoxy Putty
If you're looking to fix a leaky pipe, epoxy putty is a reliable and straightforward solution that can be applied even if you're not a construction expert. This moldable sealant adheres to the surface of the pipe, creating a strong bond that cures to seal cracks and stop leaks. It's particularly useful in the bathroom, where moisture is prevalent and leaks can cause significant damage over time.
When you discover a plumbing leak, clean the affected area thoroughly before applying the epoxy putty to ensure the best adhesion. Cut off the necessary amount of putty, knead it until it's pliable, and firmly press it over the crack. Within minutes, the putty will begin to harden, effectively sealing the leak and preventing water from escaping.
Remember, while epoxy putty offers a quick fix for minor leaks, it's not a substitute for professional repairs on larger issues. If you're dealing with a significant plumbing leak, especially one that could impact the structural integrity of your home, it's wise to consult a professional. They can provide a permanent solution that ensures the safety and functionality of your plumbing system.
Considering Pipe Replacement for Severe Damage
When you're faced with severe damage to your pipes, such as deep corrosion or a burst section, pipe replacement might be your most viable option. This step is critical to ensure the safety and efficiency of your plumbing system. Replacing compromised pipes can prevent potential water damage and costly repairs down the line, making it a prudent long-term investment in your property's infrastructure.
If you notice persistent leaks despite previous repairs, or if there's significant discoloration and flaking on the pipes, these are strong indicators that it's time to consider pipe replacement.
You'll want to act swiftly to replace the damaged sections before they lead to more serious issues, such as water contamination or structural damage to your home.
Undertaking pipe replacement can be a complex task, requiring you to shut off the main water supply and remove the affected piping. While this may seem daunting, it's essential for maintaining a robust plumbing system. If you're not entirely confident in your ability to perform this task, enlisting the services of a professional plumber can ensure the job is done correctly and safely, providing you with peace of mind and a leak-free home.
Preventing Future Leaks With Regular Maintenance
To safeguard your home against the inconvenience of plumbing leaks, regular maintenance is essential. This section will guide you through conducting routine inspections of plumbing fixtures, maintaining optimal water pressure levels, and the importance of cleaning and descaling faucets. You'll also learn the significance of replacing aging or faulty plumbing components and the benefits of insulating pipes to prevent freezing and bursting. These preventative measures are crucial for the longevity and efficiency of your plumbing system.
Conducting Routine Inspections of Plumbing Fixtures
Regular inspections of your plumbing fixtures are a proactive measure to prevent leaks before they start. By examining faucets, showerheads, and under-sink connections, you can catch early signs of wear or damage. This vigilance allows you to replace components like washers and O-rings before they fail, maintaining a leak-free home.
During these inspections, pay close attention to any mineral buildup or corrosion, as these can compromise fixture integrity. If you notice any irregularities, addressing them promptly can prevent the small issues from escalating into costly repairs. Your diligence in this routine maintenance can extend the life of your plumbing system significantly.
Remember, detecting a leak early can save you from the inconvenience of extensive water damage. If you're unfamiliar with the intricacies of your plumbing fixtures, consider scheduling annual inspections with a professional plumber. Their expertise can provide peace of mind and ensure your plumbing remains in optimal condition.
Maintaining Optimal Water Pressure Levels
Maintaining optimal water pressure in your plumbing system is crucial to prevent leaks and ensure the longevity of your pipes and fixtures. If the pressure is too high, it can strain your plumbing, leading to leaks or even burst pipes. You can check your home's water pressure with a gauge and adjust it using a pressure regulator if necessary, keeping it within the safe range of 40-60 pounds per square inch (psi).
Regularly monitoring your water pressure can alert you to changes that may indicate a leak or other issues within your plumbing system. If you notice a sudden drop in pressure, it could be a sign of a hidden leak that needs immediate attention. Conversely, a significant increase might suggest an obstruction or fault in the pressure regulator, both of which require prompt resolution to avoid damage.
By ensuring your water pressure is balanced, you not only prevent leaks but also contribute to the efficient operation of your household appliances. Appliances like dishwashers and washing machines rely on consistent pressure to function properly. If you're unsure how to manage your water pressure or detect irregularities, a professional plumber can provide expert assistance and peace of mind.
Cleaning and Descaling Faucets Regularly
Regular cleaning and descaling of your faucets are critical to preventing leaks and ensuring their longevity. Over time, mineral deposits from hard water can build up, causing blockages and corrosion that may lead to leaks. By routinely removing these deposits, you maintain the faucet's functionality and appearance, while also extending its lifespan.
You can easily descale your faucets using a simple solution of vinegar and water, which effectively breaks down mineral buildup without the need for harsh chemicals. Soak a cloth in the mixture and wrap it around the affected areas, allowing it to sit and dissolve the deposits.
This non-toxic approach not only preserves the integrity of your faucets but also keeps your home's water system clean and efficient.
By addressing the maintenance needs of your faucets, you're taking a proactive step towards a leak-free home. Regular descaling prevents the deterioration of internal components, which can cause leaks and costly repairs. Your vigilance in this simple yet essential task ensures that your
faucets continue to operate smoothly, providing you with reliable service day after day.
Replacing Aging or Faulty Plumbing Components
Replacing aging or faulty plumbing components is a critical step in safeguarding your home against leaks. Over time, fixtures and pipes can deteriorate, leading to inefficiencies and potential water damage. By proactively updating old valves, pipes, and connectors, you ensure your plumbing system operates smoothly, preventing the stress and cost of emergency repairs.
You might not always notice when a component begins to fail, but subtle signs like a slight decrease in water pressure or a rusty water appearance can signal the need for replacement.
Addressing these issues promptly by installing new, durable plumbing parts not only resolves immediate concerns but also contributes to the overall longevity of your system.
Consider the peace of mind that comes with knowing your plumbing is reliable. Regularly replacing worn components, such as washers, O-rings, and seals, can prevent the minor drips that lead to larger issues. Engage with a trusted plumber to assess and update your plumbing infrastructure, ensuring your home remains leak-free and efficient.
Insulating Pipes to Prevent Freezing and Bursting
Insulating your pipes is a proactive measure to prevent the costly and inconvenient aftermath of freezing and bursting, especially during the colder months. By wrapping exposed pipes with insulation foam, you create a barrier against the cold, reducing the likelihood of water freezing within your plumbing system. This simple step can save you from the disruption of emergency repairs and the potential for water damage in your home.
When you insulate your pipes, you're not only protecting them from extreme temperatures but also improving their efficiency. Insulated hot water pipes can reduce heat loss, ensuring that your water heater doesn't work overtime to maintain the desired temperature. This can lead to energy savings and a more consistent hot water supply, enhancing your daily comfort and convenience.
Remember, the areas most vulnerable to freezing are those in unheated spaces such as basements, attics, and garages. Pay particular attention to insulating these sections of your plumbing to prevent the expansion and contraction that can lead to leaks. With proper insulation, you can maintain a reliable plumbing system and avoid the stress of dealing with burst pipes.
Knowing When to Call a Professional Plumber
While tackling minor leaks might be within your DIY capabilities, recognizing when a plumbing issue is beyond your expertise is crucial. Complex plumbing problems require professional intervention to avoid the risks associated with improper fixes. In this guide, you'll learn how to identify when it's time to seek a qualified and trustworthy plumbing service, prepare your home for professional repair work, and understand the factors influencing repair costs and service warranties. These insights will ensure you make informed decisions for maintaining a leak-free home.
Recognizing Complex Plumbing Issues Beyond DIY Repair
When you're faced with a plumbing issue that persists despite your best DIY efforts, it may be time to call in a professional plumber. Complex problems like persistent leaks after multiple repairs, low water pressure throughout your home, or the sound of water running when all taps are closed could indicate underlying issues that require expert attention. A professional can diagnose and resolve these intricate plumbing challenges, ensuring your system functions efficiently and safely.
If you encounter signs of severe pipe damage, such as water stains on walls or ceilings, a noticeable drop in water quality, or a sudden spike in your water bill, these are red flags signaling the need for a professional assessment. Attempting to tackle these issues on your own could lead to further damage or even a plumbing emergency. Trust a skilled plumber to bring their specialized tools and experience to effectively manage these critical situations.
Remember, while routine maintenance and minor repairs are within your grasp, recognizing when a problem exceeds your expertise is crucial for the well-being of your plumbing system. If you're unsure about the source of a leak or how to fix it, seeking professional help can save you time, money, and the potential for costly mistakes. A licensed plumber will not only repair the issue but also provide valuable insights to prevent future leaks, contributing to the long-term health of your plumbing infrastructure.
Understanding the Risks of Improper Fixes
Embarking on plumbing repairs without the proper expertise can lead to more than just a persistent drip; it can cause extensive water damage and costly consequences. If you attempt to fix a leaky faucet and overlook a crucial step or use the wrong materials, you risk exacerbating the issue, which could result in a full-blown plumbing emergency. It's essential to understand the complexity of your plumbing system and when it's time to call a professional plumber to ensure repairs are conducted safely and effectively.
When you opt for a makeshift solution, such as applying excessive sealant or using mismatched pipe fittings, you're not addressing the root cause of the leak. This can lead to a temporary fix that fails under pressure, potentially flooding your home and causing significant damage to floors, walls, and personal property. A professional plumber will not only repair the leak but also provide a durable solution that stands the test of time, safeguarding your home against future plumbing failures.
Incorrect plumbing repairs can also have implications for your health and safety. For instance, a poorly executed repair on a gas water heater could lead to dangerous gas leaks, while a misaligned drain pipe might result in sewage backups. To protect your well-being and ensure compliance with local building codes, it's prudent to entrust complex plumbing repairs to licensed professionals who can guarantee the job is done right, giving you peace of mind and maintaining the integrity of your plumbing system.
Finding a Qualified and Trustworthy Plumbing Service
When you're in need of a plumbing service, it's essential to choose a provider with a solid reputation for reliability and quality workmanship. Start by seeking recommendations from friends or neighbors who have had positive experiences with local plumbers. They can provide you with firsthand accounts of the service quality and reliability, giving you confidence in your selection.
Researching online reviews and ratings can also guide you to a trustworthy plumbing service.
Look for a company with a high number of positive reviews and check their responses to customer feedback. This will give you insight into their commitment to customer satisfaction and their ability to handle any issues that may arise during a plumbing repair.
Before you commit to a plumbing service, verify their credentials and ensure they are licensed and insured. This protects you from liability and guarantees that the plumbers have the necessary training and expertise to handle your leaky faucets and plumbing leaks effectively.
A qualified plumber will be transparent about their qualifications and happy to provide proof upon request.
Preparing Your Home for Professional Repair Work
Before a professional plumber arrives, clear the area around the leak to provide unobstructed access. This not only facilitates a quicker repair but also helps prevent any additional damage to your belongings. By organizing the workspace, you're ensuring that the plumber can immediately focus on the task at hand, diagnosing and fixing the plumbing leak efficiently.
It's beneficial to document the symptoms and history of the leak before the plumber's visit. If you've noticed a change in water pressure or the times when the leak worsens, share this information with your plumber. This insight can significantly aid in pinpointing the issue, potentially reducing the time and cost associated with the repair.
Ensure that your main water valve is easily accessible and that you know how to shut it off. In the event that the plumber needs to test the repaired faucet or plumbing, having quick access to the valve can expedite the process. Your readiness to assist with such details can contribute to a smoother and more effective repair service.
Evaluating Repair Costs and Service Warranties
When you're considering professional plumbing services, it's essential to understand the potential costs involved. Request detailed estimates from several plumbers to compare rates for labor and parts. This comparison will help you gauge the market rate and ensure you're getting fair value for the repair of your leaky faucets and plumbing leaks. Be mindful of quotes that seem unusually low, as they may not include the same level of service or quality parts, potentially leading to more costs in the long run.
Service warranties are a critical aspect of any plumbing repair, offering you protection and assurance in the workmanship and materials used. Before you agree to any services, inquire about the warranty terms and what they cover. A reputable plumber will provide a warranty that covers both parts and labor, giving you peace of mind that if the leak reoccurs, the issue will be addressed without additional charges.
Understanding the scope of work and the associated warranty can prevent surprises down the line. When you're discussing the repair of a plumbing leak, ask your plumber to explain the process and any guarantees in writing. This documentation ensures you have a clear understanding of what the service entails and the support you can expect after the job is completed, allowing you to make an informed decision on your plumbing needs.
Conclusion
Addressing leaky faucets and plumbing leaks promptly is crucial to maintaining a home's structural integrity and preventing costly water damage. Regular inspections and maintenance, such as replacing worn components and descaling fixtures, are key to avoiding the disruptions of emergency repairs. For complex issues beyond DIY solutions, enlisting a professional plumber ensures safe and effective repairs, safeguarded by service warranties. Ultimately, a proactive approach to plumbing care saves money, conserves water, and upholds the comfort and safety of your living environment.
Have a question about this topic? Contact K & K Plumbing or call 330-875-8003 for a free estimate.