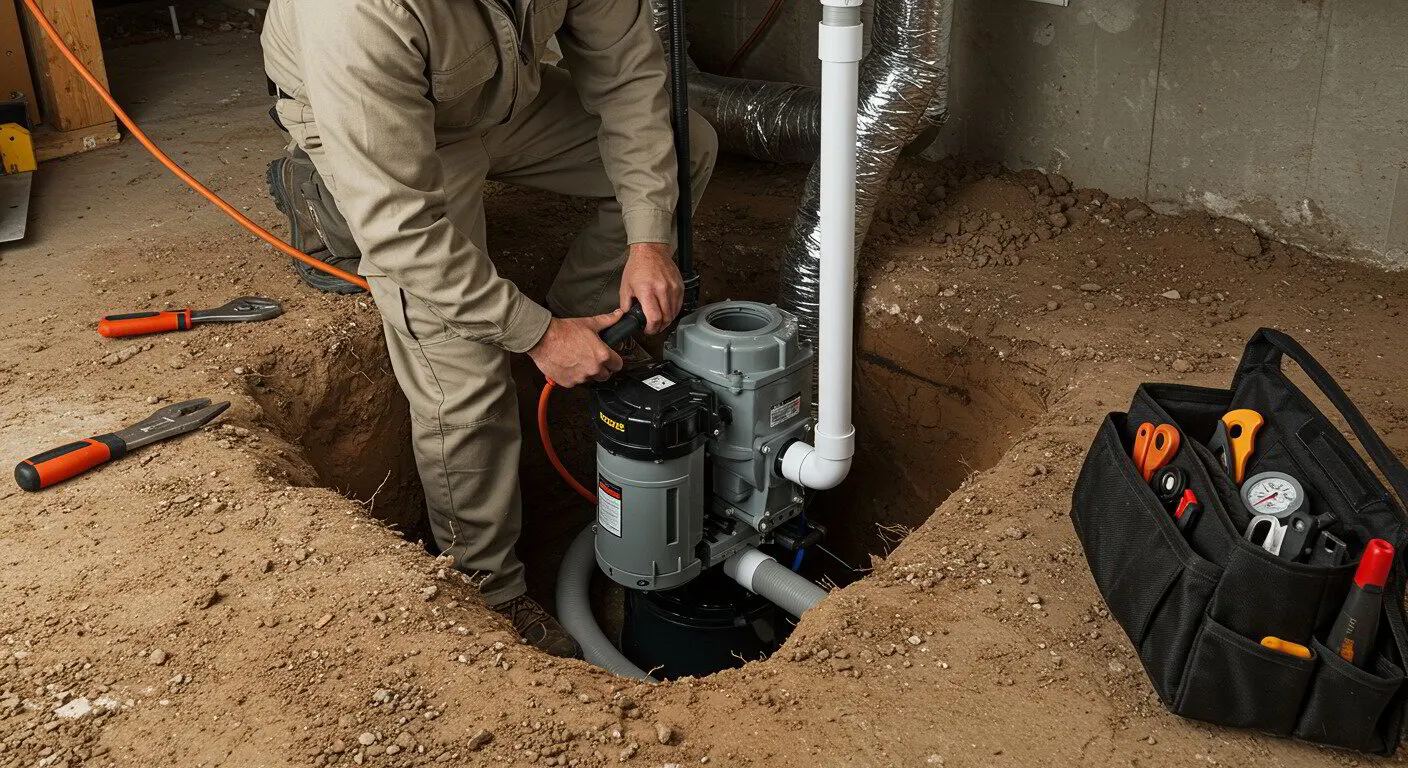
A sump pump serves as your property's first line of defense against basement flooding and water damage. This mechanical device sits in a specially constructed pit, called a sump basin, and automatically removes water that accumulates around your home's foundation. When groundwater levels rise due to heavy rainfall, snowmelt, or poor drainage, your sump pump springs into action to prevent basement flooding.
Property owners typically install sump pumps when dealing with recurring water issues, high water tables, or as a preventive measure during basement waterproofing projects.
The installation becomes particularly crucial for homes built in flood-prone areas or properties with below-grade living spaces.
The benefits of having a properly installed sump pump extend far beyond simple water removal. These systems protect your foundation from water damage, prevent mold and mildew growth, preserve stored items in basements, and maintain your property's structural integrity. For landlords and property managers, sump pumps represent a smart investment that protects rental income and reduces emergency repair costs. Most importantly, these
drainage solutions provide peace of mind during severe weather events, knowing your property has reliable water damage prevention measures in place.
Choosing the Right Sump Pump
Understanding the different types of sump pumps available helps ensure you select the most appropriate system for your specific needs. The two primary categories are pedestal and submersible pumps, each offering distinct advantages depending on your installation requirements and budget considerations.
Pedestal sump pumps feature a motor mounted above the sump pit, connected to an impeller at the bottom via a shaft. These units typically cost less initially and offer easier access for maintenance and repairs. However, they operate louder than submersible models and may not fit in shallow sump pits. Pedestal pumps work well for homeowners seeking cost-effective
plumbing solutions Ohio residents can rely on for basic water removal needs.
Submersible sump pumps sit entirely within the sump basin, with both motor and impeller
housed underwater. These pumps operate more quietly, save basement space, and generally provide more powerful water removal capabilities. While submersible units require higher upfront investment, they often last longer and handle heavy water volumes more effectively.
Key features to evaluate include horsepower ratings, pumping capacity measured in gallons per hour, maximum head height, and power source options. Consider battery backup systems for properties prone to power outages during storms. Automatic float switches ensure hands
-free operation, while adjustable switches accommodate varying water levels.
Size and capacity calculations depend on your basement's square footage, typical water
accumulation rates, and local rainfall patterns. A standard residential sump pump should handle 2,500 to 3,000 gallons per hour. Properties with severe water issues may require higher-capacity units or multiple pump systems. Professional assessment helps determine optimal sizing for your specific drainage solutions needs.
Tools and Materials Needed for Sump Pump Installation
Proper preparation ensures smooth sump pump installation and reduces the likelihood of complications during the process. Having the right tools and materials readily available saves time and prevents project delays that could leave your property vulnerable to water damage.
Essential tools include a shovel for excavating the sump pit, a jackhammer or concrete saw for cutting through basement floors, a level to ensure proper pump positioning, and a drill with masonry bits for creating discharge pipe holes. You'll also need pipe wrenches, a hacksaw for cutting PVC pipes, measuring tape, and a utility knife for various cutting tasks.
Required materials encompass the sump pump unit itself, a sump basin or liner, PVC discharge piping, pipe fittings and couplers, gravel for pit drainage, concrete mix for sealing around the basin, and waterproof sealant. Don't forget the check valve to prevent water backflow, pipe hangers for securing discharge lines, and electrical components including GFCI outlets and appropriate wiring.
Safety equipment deserves equal attention during any basement waterproofing project. Protective eyewear shields against concrete debris, work gloves provide grip and hand protection, and dust masks prevent inhalation of concrete particles. Knee pads offer comfort during extended floor-level work, while proper lighting ensures visibility in basement conditions.
Consider renting specialized equipment like pneumatic jackhammers for thick concrete floors or wet/dry vacuums for cleanup. Professional-grade tools often complete tasks more efficiently than basic household versions, making rental costs worthwhile for complex installations.
Step-by-Step Guide to Installing a Sump Pump
Successful sump pump installation requires careful planning and methodical execution.
These comprehensive sump pump installation tips guide you through each phase of the
process, ensuring reliable water damage prevention for your property.
Site Preparation and Assessment
Begin by identifying the lowest point in your basement where water naturally accumulates.
This location typically sits near the foundation's interior perimeter. Mark the sump pit location,
ensuring adequate clearance for pump access and discharge pipe routing. Check for underground utilities before excavating, and verify local building codes regarding sump pump installations.
Creating the Sump Pit
Excavate a hole approximately 6 inches wider than your sump basin and 6 inches deeper than the basin height. For concrete floors, use a concrete saw to cut the perimeter, then break out sections with a jackhammer. Remove soil and debris, creating clean, straight walls. The pit depth should accommodate the entire basin plus a gravel base layer.
Basin Installation and Drainage
Place 2-3 inches of gravel at the pit bottom for drainage, then position the sump basin. Ensure the basin sits level and flush with the basement floor. Pack gravel around the basin's exterior, leaving the top 3 inches for concrete backfill. This gravel layer facilitates water flow into the basin while providing structural support.
Pump Installation and Plumbing Connections
Position the sump pump in the basin center, ensuring the float switch operates freely without obstruction. Connect the discharge pipe to the pump outlet using appropriate fittings. Install a check valve in the vertical discharge line to prevent water backflow when the pump cycles off.
Discharge Line Routing
Route the discharge pipe through the basement wall, maintaining proper slope for drainage.
The pipe should exit below the frost line but above ground level outside. Extend the exterior
discharge line at least 10 feet from the foundation, directing water away from the house. Use pipe hangers to secure interior portions of the discharge line.
Electrical Connections and Testing
Connect the pump to a dedicated GFCI-protected electrical circuit. Test the installation by slowly filling the basin with water until the float switch activates the pump. Verify proper pump operation, adequate water removal, and check valve function. Pour additional water to test multiple pump cycles, ensuring consistent performance.
Final Sealing and Cleanup
Mix concrete and carefully fill the gap between the basin and pit walls, creating a smooth transition with the existing floor. Allow concrete to cure completely before regular use. Clean all tools and dispose of construction debris properly.
Maintenance Tips for Keeping Your Sump Pump
in Top Condition
Regular sump pump maintenance ensures reliable operation when you need it most.
Establishing a consistent inspection schedule prevents unexpected failures during critical
weather events and extends your system's operational lifespan.
Monthly inspections should include visual checks of the sump pit for debris accumulation,
verification that the float switch moves freely, and examination of discharge pipes for obstructions.
Listen for unusual noises during pump operation, which may indicate mechanical problems
requiring attention.
Quarterly maintenance involves more thorough sump pump maintenance procedures.
Remove the pump from the basin and clean the intake screen, removing any accumulated sediment or debris. Check all electrical connections for corrosion or looseness, and test the GFCI outlet function. Inspect the discharge pipe exterior terminus, ensuring proper drainage away from the foundation.
Annual comprehensive servicing includes professional evaluation of pump motor condition, impeller wear, and overall system performance. Consider having backup power systems tested and batteries replaced as needed. This proactive approach to drainage solutions maintenance prevents costly emergency repairs and ensures continued water damage
prevention.
Document all maintenance activities, including dates, observations, and any issues discovered.
This maintenance log helps identify patterns and assists professional technicians during service calls. Property managers should incorporate sump pump maintenance into regular building inspection routines, ensuring tenant protection and property preservation.
Common Issues and Troubleshooting Tips
Recognizing early warning signs of sump pump problems allows for timely intervention before complete system failure occurs. Common indicators include unusual noises during operation, frequent cycling, reduced pumping capacity, or visible water accumulation in areas previously kept dry.
Basic troubleshooting begins with checking power supply connections and GFCI outlet function.
Verify the float switch moves freely and isn't stuck against the basin wall. Clear any debris from the pump intake and ensure the discharge pipe remains unobstructed.
When pumps run continuously without reducing water levels, check for discharge pipe blockages or failed check valves allowing water backflow. If the pump fails to start despite adequate water levels, electrical issues or motor failure may require professional intervention. Contact experienced plumbing solutions Ohio professionals when troubleshooting efforts don't resolve operational problems or when electrical components need attention.
Conclusion and Next Steps
Proper sump pump installation protects your property investment while providing reliable defense against basement flooding. Following these essential sump pump installation tips ensures your system operates effectively when severe weather threatens your property. Remember that successful installation combines careful planning, quality components, and professional execution.
While determined property owners can handle basic installations, complex situations benefit from professional expertise. Challenging installations involving electrical work, structural modifications, or multiple pump systems require specialized knowledge and experience.
Ready to protect your property with professional sump pump installation? Contact K and K Plumbing Ohio at 330-875-8003 for expert installation services and reliable plumbing solutions.
Our experienced team provides transparent pricing, fast response times, and long-term fixes that property owners trust. Visit https://kandkplumbing.com/ to schedule your consultation today and ensure your property stays dry and protected.
Have a question about this topic? Contact K & K Plumbing or call 330-875-8003 for a free estimate.