
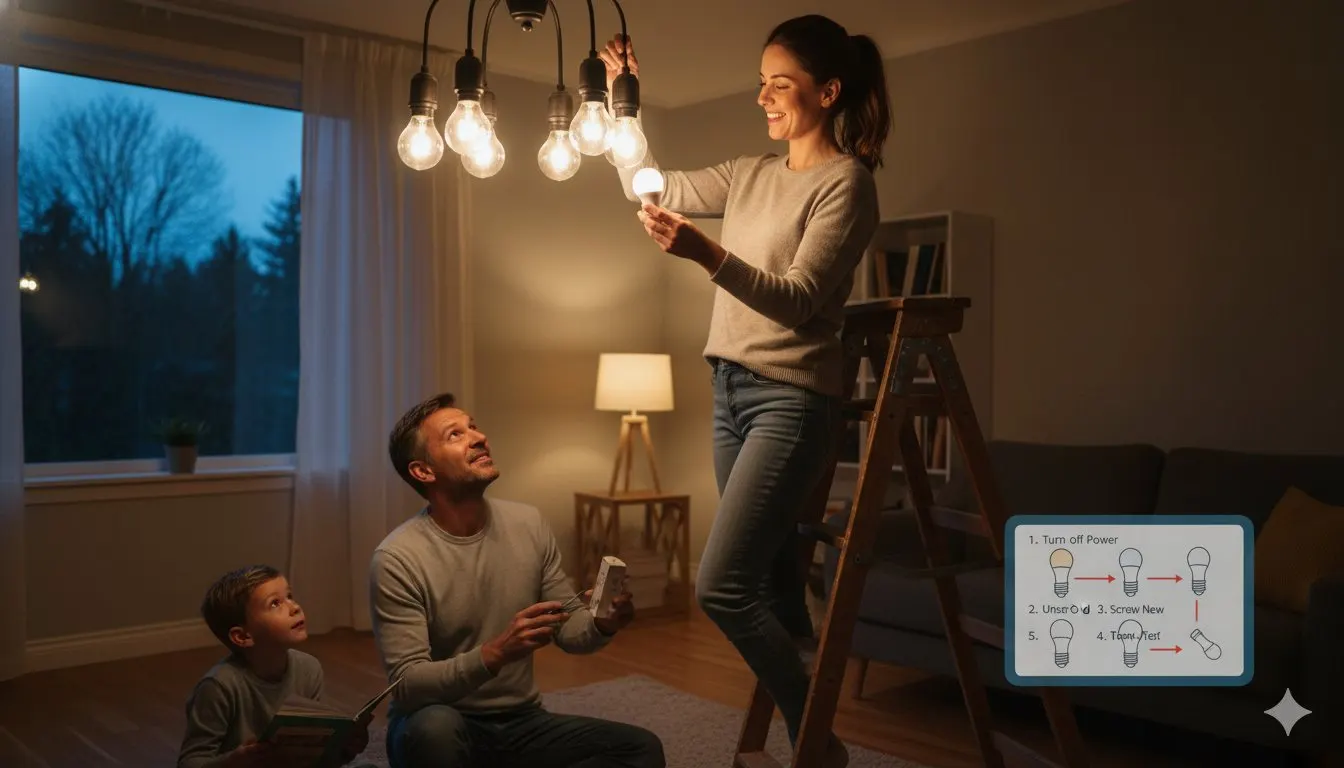
Proper lighting maintenance stands as one of the most fundamental yet overlooked aspects of home and property management. Whether you're a homeowner maintaining your family residence, a landlord ensuring tenant satisfaction, or a property manager overseeing multiple buildings, understanding how to replace a light bulb effectively can save time, money, and prevent unnecessary service calls.
Light bulb replacement might seem like a simple task, but modern homes feature increasingly diverse lighting systems that require specific knowledge and techniques. From traditional incandescent fixtures to contemporary LED installations, each type presents unique considerations for safe and effective replacement. The evolution of lighting technology has introduced energy-efficient options that last longer and perform better, but only when properly installed and maintained.
This comprehensive guide addresses the complete process of light bulb replacement, covering everything from basic safety protocols to advanced troubleshooting techniques. We'll explore the various types of light bulbs available today, including incandescent, compact fluorescent (CFL), and LED options, each offering distinct advantages for different applications. Understanding these differences ensures you select the right replacement bulb for optimal performance and longevity.
Professional property maintenance extends beyond simple repairs to encompass preventive measures that protect your investment and ensure occupant safety. Proper light fixture maintenance contributes to overall electrical system health and can prevent more serious issues that require professional intervention.
Tools and Materials Needed for Light Bulb Replacement
Successful light bulb replacement begins with proper preparation and having the right tools readily available. Safety precautions form the foundation of any DIY home repairs project, particularly when working with electrical fixtures. Before beginning any light bulb replacement task, always turn off the power at the circuit breaker, not just the wall switch. This extra precaution prevents accidental electrical shock and protects both you and your electrical system.
Essential safety equipment includes insulated gloves, which provide protection against electrical current and prevent cuts from broken glass. Safety glasses protect your eyes from falling debris or glass fragments, especially when working overhead. Non-slip shoes with rubber soles offer better grip when using ladders or step stools, reducing the risk of falls during the replacement process.
The basic tool kit for light bulb replacement should include a sturdy step ladder or step stool appropriate for the fixture height. Choose a ladder that allows you to reach comfortably without overextending. A screwdriver set with both flathead and Phillips head options proves invaluable for removing fixture covers or housings. Keep a flashlight or headlamp handy for better visibility, particularly in dimly lit areas or when working with recessed fixtures.
Understanding different light bulb types helps ensure proper replacement selection. Incandescent bulbs remain popular for their warm light and low initial cost, though they consume more energy and have shorter lifespans. Compact fluorescent lamps (CFLs) offer improved energy efficiency but require special disposal considerations due to mercury content. LED bulbs represent the most energy-efficient option, lasting significantly longer than traditional alternatives while producing minimal heat.
When selecting replacement bulbs, verify the correct wattage, base type, and size specifications. Check the fixture's maximum wattage rating to prevent overheating and potential fire hazards. Modern LED bulbs often produce equivalent light output at much lower wattage levels, making them excellent energy-saving alternatives to traditional incandescent bulbs.
Step-by-Step Guide to Replacing a Light Bulb
Step 1: Turn Off the Power
The first and most critical step in learning how to replace a light bulb safely involves completely disconnecting power to the fixture. While turning off the wall switch provides basic protection, professional electricians recommend turning off power at the circuit breaker for maximum safety. This additional precaution prevents accidental switch activation during the replacement process and protects against potential electrical faults.
Locate the appropriate circuit breaker by testing different switches until you find the one controlling your target fixture. Label the breaker for future reference, as this information proves valuable for ongoing home maintenance. Allow the existing bulb to cool completely before removal, as incandescent and halogen bulbs generate significant heat during operation. Hot bulbs can cause severe burns and may shatter when handled improperly.
Use a non-contact voltage tester to verify power disconnection before proceeding. These inexpensive tools detect electrical current without direct contact, providing an additional safety verification. Test the device on a known live circuit first to ensure proper operation, then check your target fixture to confirm power absence.
Step 2: Remove the Old Bulb
Proper bulb removal technique depends on the specific fixture type and bulb design. For standard screw-base bulbs, turn counterclockwise while supporting the bulb's weight to prevent dropping. Apply gentle, steady pressure rather than forcing the bulb, as excessive pressure can cause breakage and create dangerous glass fragments.
Bayonet-style bulbs require a different approach: push the bulb slightly upward while turning counterclockwise until the pins align with the fixture slots, then lower the bulb carefully. Recessed fixtures often feature spring-loaded mechanisms that require gentle pressure to release the bulb from its housing.
If encountering resistance during removal, stop immediately and assess the situation. Stuck bulbs often result from corrosion, paint buildup, or thermal expansion. Never force a stubborn bulb, as this frequently leads to breakage and potential injury. Instead, apply penetrating oil around the base and allow time for it to work before attempting removal again.
For broken bulbs, disconnect power completely and use needle-nose pliers to grip the remaining base threads. Turn counterclockwise while maintaining steady pressure until the base releases. Alternatively, press a raw potato firmly onto the broken glass and turn counterclockwise, allowing the potato to provide grip on the glass fragments.
Step 3: Install the New Bulb
Before installation, verify that your replacement bulb matches the fixture's specifications for wattage, base type, and physical dimensions. Installing an incorrect bulb can damage the fixture, create safety hazards, or result in poor performance. When learning how to install LED bulbs, pay particular attention to compatibility with existing dimmer switches, as not all LED bulbs work properly with older dimming systems.
Handle the new bulb by its base rather than the glass envelope to prevent damage and maintain cleanliness. Oils from skin contact can create hot spots on incandescent bulbs, potentially shortening their lifespan. For screw-base installations, thread the bulb clockwise until snug, but avoid over-tightening, which can damage both the bulb and fixture threads.
Bayonet bulbs require alignment of the pins with the fixture slots before pushing upward and turning clockwise until the bulb locks into position. Ensure the bulb sits securely in the fixture without wobbling or loose connections. For recessed fixtures, align the bulb properly with any retaining clips or springs before releasing pressure.
LED bulbs often feature directional light output, so proper orientation ensures optimal illumination patterns. Some LED bulbs include orientation markers or instructions for best performance. Take time to position these bulbs correctly for maximum light distribution and efficiency.
Step 4: Test the New Bulb
After completing the installation, restore power at the circuit breaker before testing the new bulb. Turn on the wall switch and observe the bulb's operation for several minutes. Proper installation should result in immediate, steady illumination without flickering, buzzing, or unusual behavior.
If the bulb fails to illuminate, verify power restoration and check all connections. Ensure the bulb is properly seated and making good electrical contact with the fixture. Some LED bulbs require a brief warm-up period to reach full brightness, so allow a few minutes before concluding there's a problem.
Monitor the new installation for any signs of overheating, unusual odors, or irregular operation. These symptoms may indicate incompatible bulbs, fixture problems, or electrical issues requiring professional attention. Document the installation date and bulb specifications for future reference and maintenance scheduling.
Common Issues During Light Bulb Replacement
Light bulb replacement projects occasionally present challenges that require specific techniques and troubleshooting approaches. Understanding these common light bulb problems helps homeowners and property managers address issues efficiently while recognizing when professional assistance becomes necessary.
Stuck bulbs represent one of the most frequent complications during replacement projects. Corrosion between the bulb base and fixture socket creates strong bonds that resist normal removal techniques. High-heat environments, such as enclosed fixtures or outdoor installations, accelerate this corrosion process. Humidity and temperature fluctuations contribute to expansion and contraction cycles that can lock bulbs in place over time.
When dealing with stuck bulbs, patience and proper technique prove more effective than brute force. Apply penetrating lubricant around the base threads and allow adequate time for penetration. Use rubber gloves or a rubber jar opener to improve grip without applying excessive pressure. Gentle back-and-forth rocking motions often help break the corrosion bond more effectively than continuous turning pressure.
Incompatible light fixtures present another common challenge, particularly when upgrading from traditional incandescent bulbs to modern LED alternatives. Fixture design, electrical characteristics, and thermal management requirements vary significantly between bulb types. Enclosed fixtures may not provide adequate ventilation for certain LED bulbs, leading to premature failure or reduced performance.
Dimmer switch compatibility issues frequently arise when installing LED bulbs in existing fixtures. Older dimmer switches designed for incandescent bulbs may not function properly with LED technology, resulting in flickering, buzzing, or limited dimming range. Modern LED-compatible dimmers use different control methods that ensure smooth operation and full functionality.
Understanding bulb wattage and fitting requirements prevents installation problems and safety hazards. Maximum wattage ratings protect fixtures from overheating and potential fire risks. LED bulbs typically consume significantly less power while producing equivalent light output, but some fixtures may have minimum load requirements for proper operation. Physical dimensions also matter, as oversized bulbs can interfere with fixture covers, shades, or surrounding structures.
Base type verification ensures proper electrical connections and mechanical fit. Common base types include standard screw bases (E26/E27), candelabra bases (E12), and various pin configurations for specialty applications. Installing the wrong base type can damage fixtures or create unsafe conditions.
When to Call a Professional
While basic light bulb replacement falls within most homeowners' capabilities, certain situations require professional electrical expertise to ensure safety and proper resolution. Recognizing these scenarios protects your property and prevents potentially dangerous DIY attempts that exceed safe skill levels.
Electrical issues that extend beyond simple bulb replacement demand professional attention. Flickering lights throughout multiple rooms may indicate loose connections, overloaded circuits, or electrical panel problems. Burning odors, sparking fixtures, or warm switch plates signal serious electrical faults requiring immediate professional intervention. These symptoms often indicate underlying problems that simple bulb replacement cannot resolve.
Bathroom and kitchen lighting installations frequently involve plumbing and electrical crossover situations that require specialized knowledge. Moisture-rated fixtures, proper grounding requirements, and ventilation considerations make these installations more complex than standard room lighting. Steam and humidity create unique challenges that affect both electrical safety and fixture longevity.
K and K Plumbing Ohio understands the interconnected nature of home systems and provides comprehensive maintenance solutions that address both plumbing and electrical concerns. Our professional team recognizes how bathroom ventilation, lighting, and plumbing systems work together to maintain comfortable, safe living environments.
High-ceiling installations and hard-to-reach fixtures often require specialized equipment and safety training that exceed typical homeowner capabilities. Professional technicians have appropriate ladders, safety equipment, and experience working at height safely. The risk of falls and injuries makes professional service a wise investment for challenging installations.
Complex fixture replacements, smart home integrations, and electrical upgrades benefit from professional expertise. Modern lighting systems often include sophisticated controls, sensors, and networking capabilities that require proper configuration and testing. Professional installation ensures optimal performance and maintains warranty coverage for expensive smart home components.
Conclusion and Final Tips
Mastering how to replace a light bulb effectively contributes to successful property maintenance and creates a foundation for broader DIY home repairs knowledge. The techniques and safety principles covered in this guide apply to various home maintenance tasks, building confidence and capability for ongoing property care.
Regular light fixture maintenance extends beyond simple bulb replacement to include cleaning, inspection, and preventive care. Dust accumulation reduces light output and creates heat retention that shortens bulb life. Schedule quarterly cleaning sessions to maintain optimal performance and identify potential issues before they require expensive repairs.
When to replace light bulbs depends on both performance and efficiency considerations. LED bulbs typically last 15,000 to 50,000 hours, while incandescent bulbs average only 1,000 hours. Tracking replacement dates helps identify fixtures with recurring problems that may require professional attention.
Energy efficiency improvements through proper bulb selection reduce operating costs and environmental impact. LED technology continues advancing, offering improved color quality, dimming performance, and smart home integration capabilities. Staying informed about lighting innovations helps property managers make cost-effective upgrade decisions.
These light bulb replacement tips provide a solid foundation for safe, effective maintenance practices. Remember that proper preparation, quality tools, and patient technique produce better results than rushing through the process. Document your maintenance activities to track patterns and plan future improvements.
Professional support remains available when projects exceed your comfort level or reveal underlying problems. K and K Plumbing Ohio stands ready to assist with complex electrical issues, bathroom fixture installations, and comprehensive home maintenance solutions that protect your investment and ensure occupant safety.
FAQs
How often should I replace light bulbs?Replace light bulbs when they burn out or show signs of dimming performance. LED bulbs typically last 15-25 years with normal use, while incandescent bulbs may need replacement annually. Monitor energy efficiency and consider upgrading to LED technology for long-term savings.
Can I replace a bulb in a high ceiling fixture?High ceiling fixtures require proper safety equipment and techniques. Use appropriate extension ladders with someone spotting you, or consider hiring professionals for fixtures above 10 feet. Never attempt replacements from unstable surfaces or makeshift platforms.
What should I do if the new bulb flickers?Flickering usually indicates loose connections, incompatible dimmer switches, or electrical problems. Verify the bulb is properly seated, check dimmer compatibility with LED bulbs, and consult an electrician if problems persist across multiple fixtures.
Ready to tackle more complex home maintenance projects? Contact K and K Plumbing Ohio at 330-875-8003 for professional electrical repairs, bathroom fixture installations, and comprehensive home maintenance solutions. Visit https://kandkplumbing.com/ to schedule your consultation and discover how our experienced team can help maintain your property's safety, efficiency, and value.
Have a question about this topic? Contact K & K Plumbing or call 330-875-8003 for a free estimate.