
Leaky pipes are among the most common plumbing issues homeowners face, and addressing them promptly is crucial for protecting your property and preventing costly damage. Understanding how to fix leaky pipes in your home can save you hundreds of dollars in water damage repairs and help maintain your property's value. When left unaddressed, even small leaks can lead to mold growth, structural damage, and significantly higher water bills.
The causes of pipe leaks vary widely, from natural wear and tear due to aging infrastructure to sudden temperature changes that cause pipes to expand and contract. Corrosion, high water pressure, and poor installation practices also contribute to common plumbing issues.
Whether you're a homeowner dealing with an unexpected leak or a property manager maintaining multiple units, having the knowledge to handle basic plumbing repair tips can be invaluable for quick response situations.
Identifying Leaky Pipes
Recognizing the early signs of pipe leaks is essential for preventing extensive damage to your property. The most obvious indicators include visible water stains on walls, ceilings, or floors, which often appear as discolored patches or rings. These stains typically start small and gradually expand as the leak persists, making early detection crucial for minimizing repair costs.
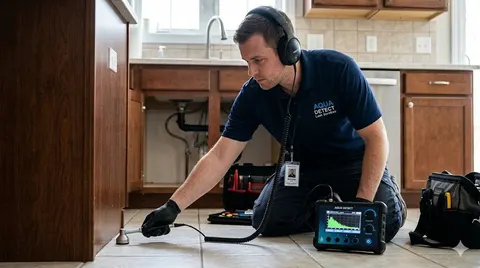
Listen carefully for the sound of dripping water, especially during quiet periods when household noise is minimal. This auditory clue often leads you directly to the leak's location. Additionally, unexplained dampness or musty odors in areas near plumbing fixtures indicate moisture accumulation from hidden leaks.
To locate the source effectively, start by checking visible pipes under sinks, around water heaters, and in basement areas. Use a flashlight to inspect joints, connections, and pipe surfaces for signs of moisture or mineral deposits. For concealed pipes, look for soft spots in walls or floors, peeling paint, or wallpaper bubbling. Water meter readings can also help confirm leaks – if the meter continues running when all water sources are turned off, you likely have a hidden leak requiring immediate attention.
Don't overlook less obvious signs like unexpectedly high water bills or reduced water pressure, which may indicate slow leaks that haven't yet caused visible damage.
Tools and Materials Needed to Fix Leaky Pipes
Before attempting any DIY plumbing fixes, gather the essential tools and materials to ensure a successful repair. Your basic tool kit should include adjustable wrenches in multiple sizes, needle-nose pliers, and both flathead and Phillips head screwdrivers. A pipe cutter or hacksaw may be necessary for more extensive repairs, while a flashlight or headlamp provides adequate lighting in cramped spaces.
For materials, stock up on pipe sealant or plumber's putty, which works effectively for minor joint leaks. Pipe repair clamps offer excellent solutions for small cracks or punctures, while epoxy putty provides temporary fixes for emergency situations. Keep various sizes of replacement washers, O-rings, and gaskets on hand, as these components frequently cause leaks when they deteriorate.
Teflon tape, also known as plumber's tape, is indispensable for creating watertight seals on threaded connections. For more significant repairs, consider purchasing pipe repair sleeves or coupling joints that match your existing pipe material. Sandpaper or steel wool helps clean pipe surfaces before applying sealants, ensuring proper adhesion.
Having a bucket, towels, and plastic sheeting nearby protects surrounding areas from water damage during repairs. Remember that different pipe materials require specific repair approaches, so identify whether you're working with copper, PVC, or galvanized steel pipes before selecting your materials.
Step-by-Step Guide to Fixing Leaky Pipes
Learning how to fix leaky pipes in your home requires following a systematic approach to ensure safe and effective repairs. This comprehensive process addresses the most common leak scenarios you'll encounter.
Step 1: Shut Off the Water Supply
Before beginning any repair work, locate and turn off the water supply to the affected area.
For localized repairs, use the shut-off valve nearest to the leak, typically found under sinks
or behind toilets. For main line issues, turn off the water supply at the main valve, usually located near your water meter. This critical first step prevents flooding and allows you to work in a dry environment.
Step 2: Drain the Pipes
After shutting off the water supply, open faucets and fixtures downstream from the repair area to drain remaining water from the pipes. This step reduces water spillage during repairs and helps you assess the full extent of the damage. Allow several minutes for complete drainage, and keep towels handy to absorb any residual water.
Step 3: Assess the Leak Type
Carefully examine the leak to determine its type and severity. Joint leaks typically occur where pipes connect and often require tightening connections or replacing gaskets. Crack leaks appear as splits along the pipe length and may need patching or pipe replacement. Puncture leaks, often caused by corrosion or physical damage, require different repair approaches depending on their size and location.
Step 4: Apply the Appropriate Fix
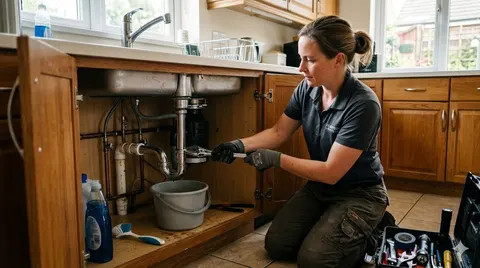
For joint leaks, try tightening the connection with an appropriate wrench. If tightening doesn't resolve the issue, disassemble the joint, clean the threads, apply new Teflon tape or pipe sealant, and reassemble. For small cracks, clean the pipe surface thoroughly and apply epoxy putty according to manufacturer instructions, ensuring complete coverage of the damaged area.
Puncture repairs may require pipe repair clamps for temporary solutions or pipe replacement for permanent fixes. When using repair clamps, center the rubber gasket over the hole and tighten the clamp screws evenly to create a watertight seal.
Step 5: Restore Water Supply and Test
Once repairs are complete, slowly restore water supply and monitor the repair area closely for any signs of continued leaking. Check your work under full water pressure and inspect surrounding areas for new leaks that may have developed during the repair process.
Preventive Measures for Future Leaks
Implementing regular maintenance practices significantly reduces the likelihood of future pipe leaks and extends your plumbing system's lifespan. Schedule monthly visual inspections of exposed pipes, checking for signs of corrosion, loose connections, or mineral buildup that could indicate developing problems.
Monitor water pressure throughout your home, as excessive pressure strains pipe joints and accelerates wear. Consider installing a pressure regulator if your water pressure consistently exceeds 80 PSI. During winter months, maintain adequate heating in areas with exposed pipes and consider pipe insulation to prevent freeze-related damage.
Watch for early warning signs including slow drains, unusual noises in pipes, or fluctuating water pressure, which often precede more serious issues. Address these emergency plumbing tips promptly to prevent minor problems from becoming major repairs requiring professional intervention.
When to Call a Professional
While many basic repairs fall within DIY capabilities, certain situations require professional expertise to ensure safety and code compliance. Contact a licensed plumber when dealing with main water line leaks, sewer line issues, or repairs involving gas lines. Additionally, if your DIY repair attempts have failed or if you discover multiple leaks simultaneously, professional assessment may reveal underlying system problems.
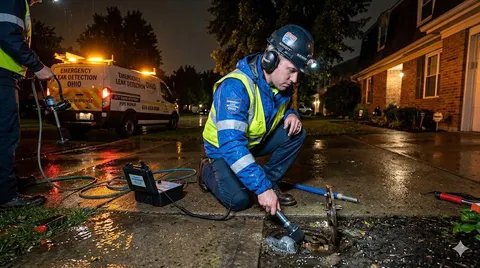
Complex repairs involving pipe replacement, especially in walls or underground locations, typically require specialized tools and expertise. Professional plumbers also ensure repairs meet local building codes and can identify potential issues that untrained individuals might overlook. When water damage is extensive or if you're uncomfortable performing the repair safely, professional intervention protects both your property and your well-being.
Conclusion
Understanding how to fix leaky pipes in your home empowers you to address common plumbing issues quickly and effectively, potentially saving thousands in water damage and professional repair costs. However, recognizing when to seek professional help ensures complex problems receive appropriate attention and prevents minor issues from becoming major disasters.
Ready for professional plumbing assistance? Contact K and K Plumbing Ohio at 330-875-8003 for expert leak detection, emergency plumbing services, and comprehensive plumbing repairs.
Our experienced team provides fast response times, transparent pricing, and long-term solutions for all your plumbing needs. Visit https://kandkplumbing.com/ to learn more about our services.
Have a question about this topic? Contact K & K Plumbing or call 330-875-8003 for a free estimate.